How to Set Up Google Play Closed Testing: Step-by-Step Guide (2026)
The complete Play Console walkthrough: creating the closed testing track, uploading your AAB, adding 12 testers, sharing the opt-in link, and starting the 14-day clock — plus fixes for the setup mistakes that silently stall launches.
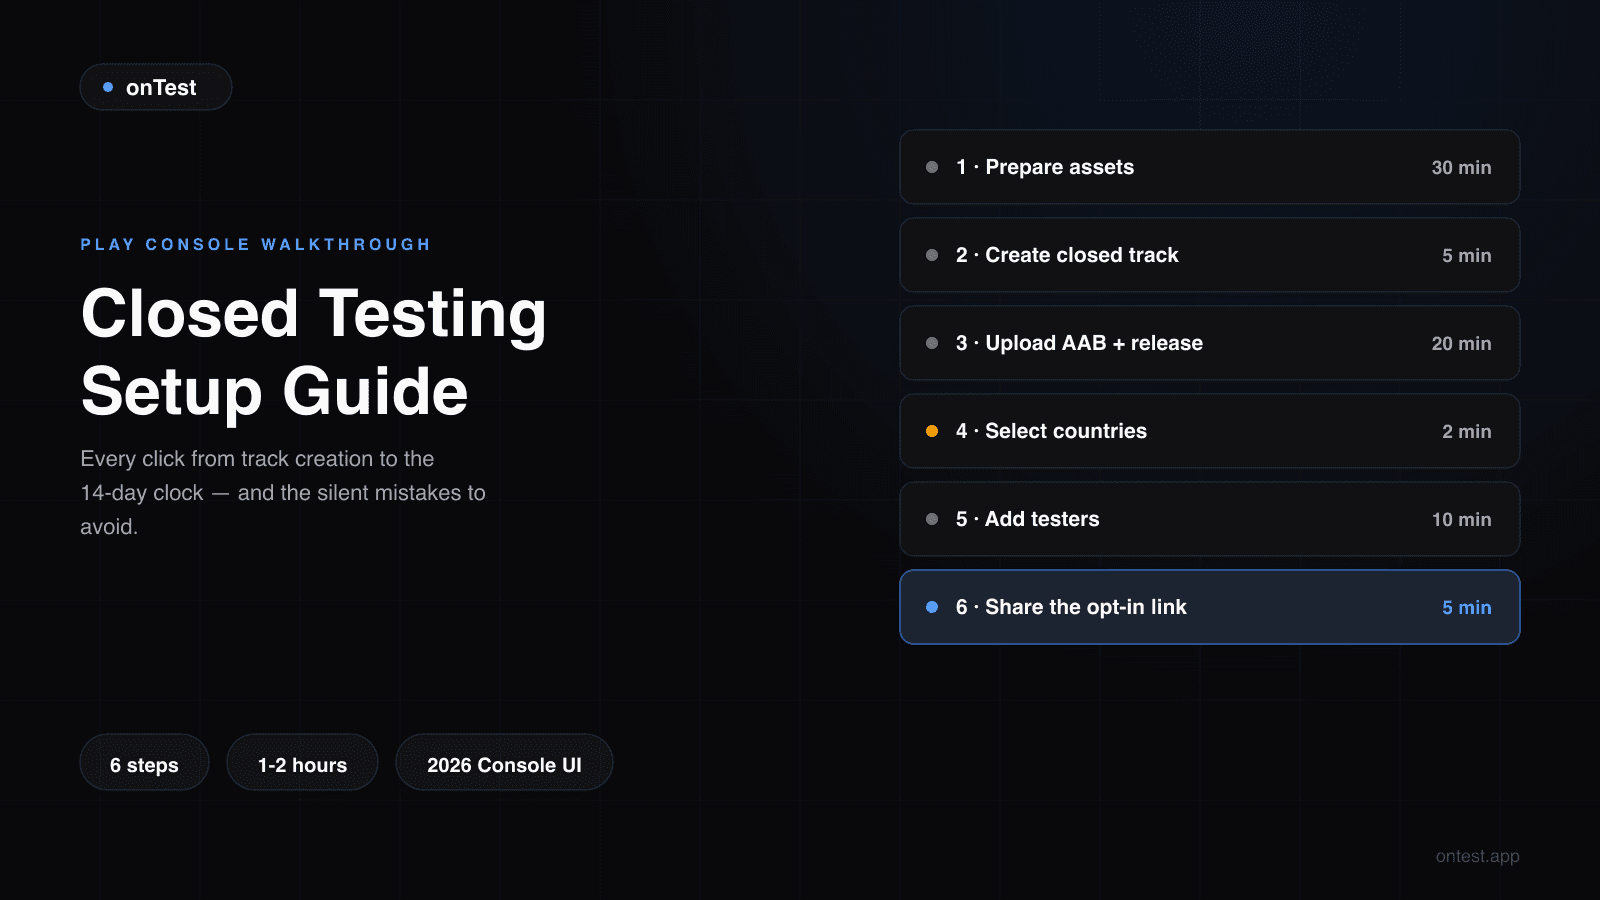
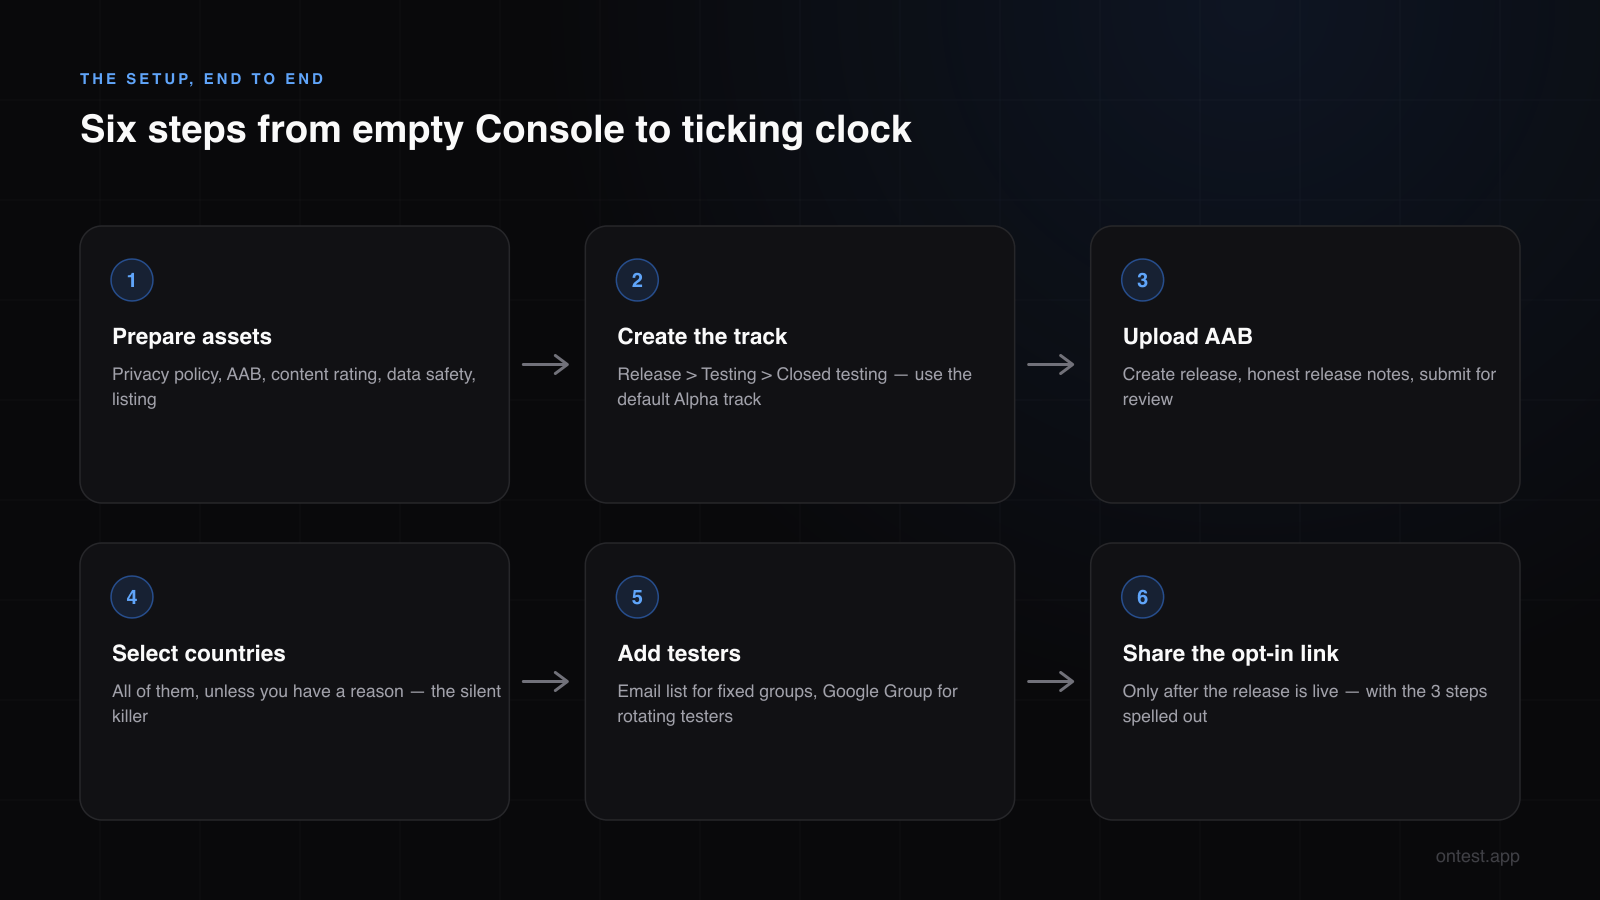
TL;DR: Setting up Google Play closed testing takes 1-2 hours if you know the path: prepare your store listing and privacy policy, create the closed testing track under Release > Testing > Closed testing, upload your AAB, add tester emails (or a Google Group), copy the opt-in link, share it, and verify opt-ins in Play Console. The 12 testers, 14 days clock only starts once your release is approved and 12 testers have opted in. This guide walks every click — including the four setup mistakes that cost developers days without any error message.
I've set up closed testing twice for my own apps — Motion Cues and Let it Rain — and I've since watched hundreds of onTest customers go through the same flow. Here's the pattern: the setup itself is genuinely easy, but almost everyone loses 2-5 days to one of a handful of silent mistakes. A country left unchecked. An opt-in link shared before the release was approved. A tester list that was saved but never activated.
This is the walkthrough I wish Play Console shipped with. Setup first, then the traps.
Internal vs. Closed vs. Open Testing: Which One You Actually Need
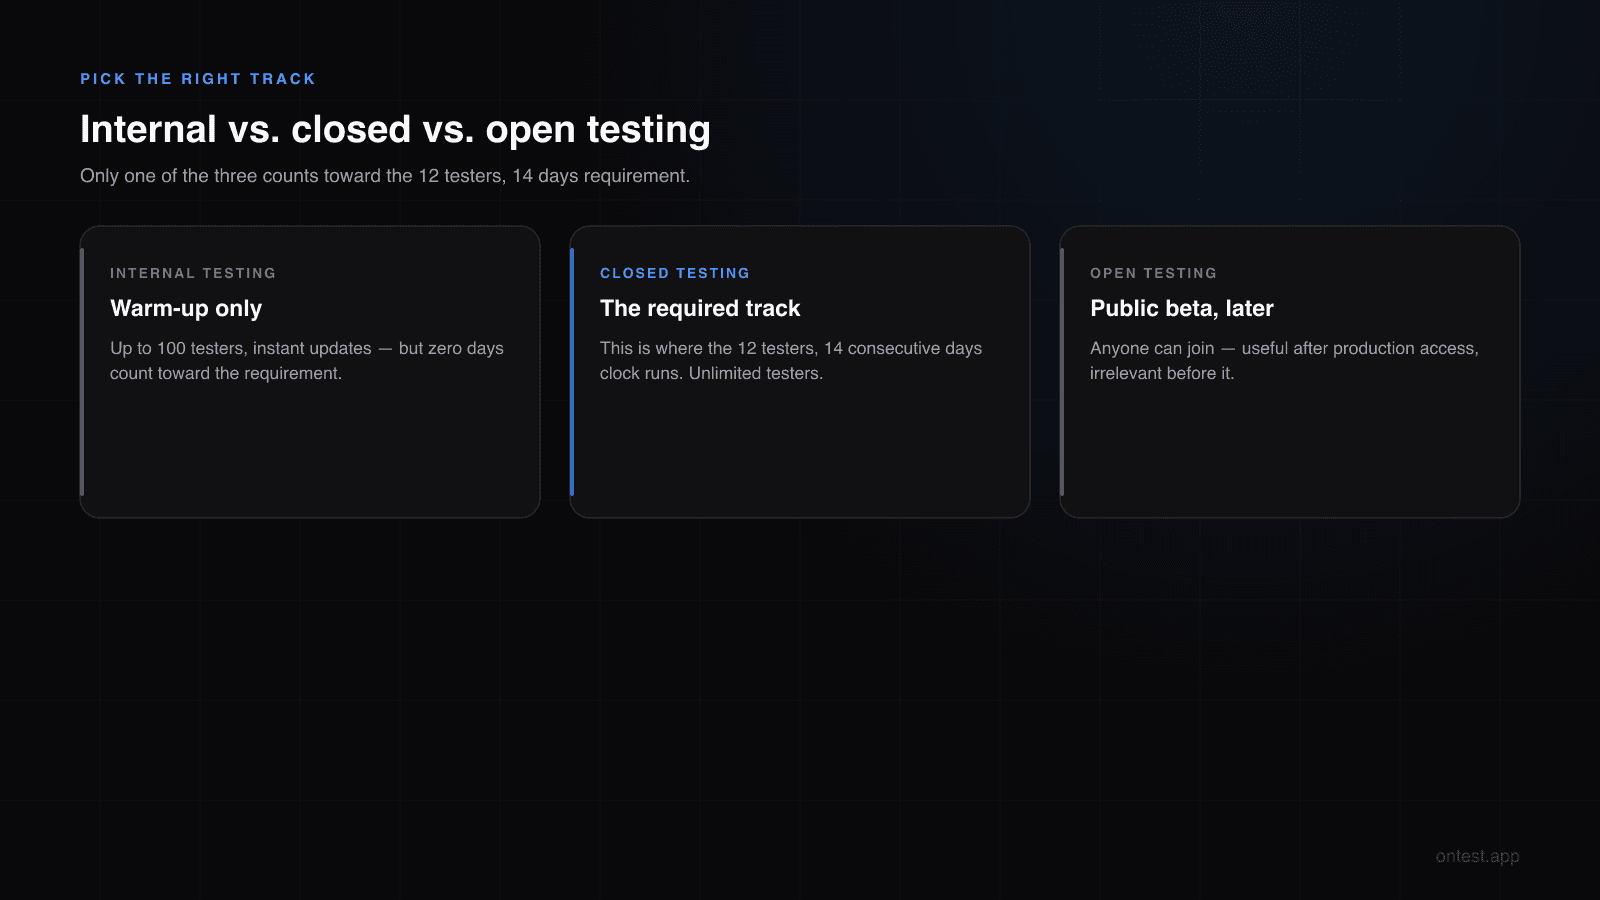
Play Console offers three testing tracks, and picking the wrong one wastes real time — days spent on internal testing count for nothing toward the 12-tester requirement.
| Track | Max testers | Counts toward the 12/14 requirement? | Best for |
|---|---|---|---|
| Internal testing | 100 | No | Your own devices, instant updates, pre-release smoke tests |
| Closed testing | Unlimited | Yes | The mandatory 12 testers, 14 days phase |
| Open testing | Unlimited | No (it's not the required track) | Public beta after production access |
The rule that matters: if your personal developer account was created on or after November 13, 2023, production access is locked until a closed test completes. Internal testing is a nice warm-up — I use it to catch embarrassing bugs before real testers see them — but the clock Google cares about only ticks on the closed track.
Before You Touch the Testing Track: The 30-Minute Pre-Flight
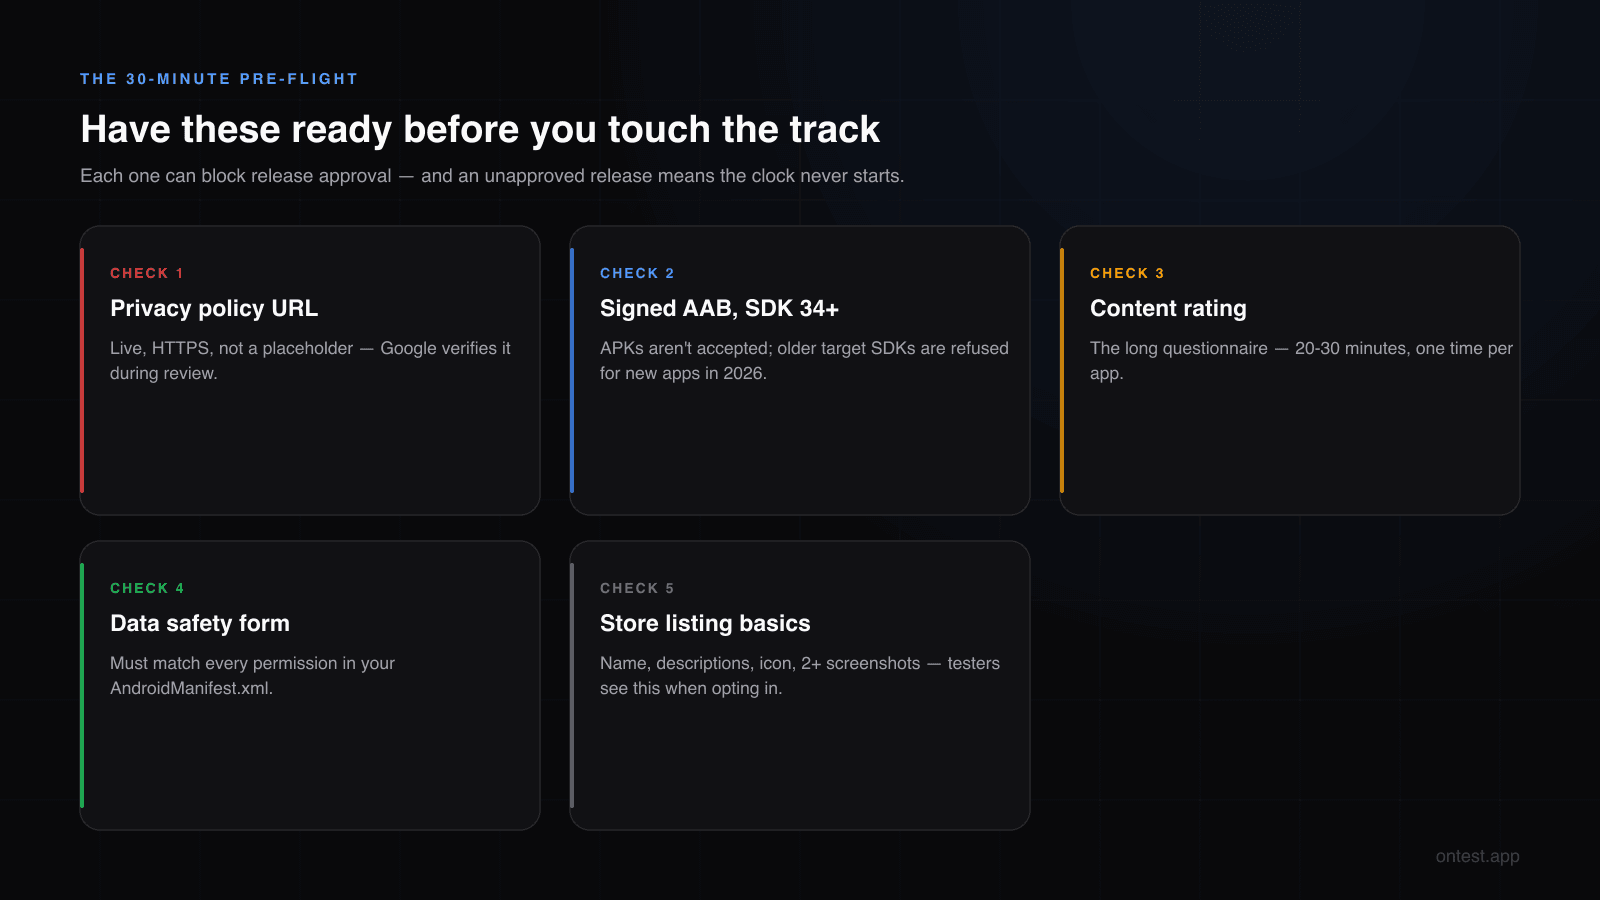
Every item below can block your release from being approved — and an unapproved release means the 14-day clock never starts, no matter how many testers you've recruited.
- Privacy policy URL, live and HTTPS. Not a placeholder, not a parked domain. Google checks it during review, and a dead privacy policy link is the most common hidden cause of rejections later.
- Signed AAB, target SDK 34+. APKs aren't accepted; older target SDKs are refused for new apps in 2026.
- Content rating questionnaire completed. Takes 20-30 minutes, annoyingly long, one-time per app.
- Data safety form matching your manifest. If your app requests location and the form says "no location collected," you'll hit a wall — maybe now, maybe during production review.
- Store listing basics. App name, short + full description, icon, at least 2 screenshots, feature graphic. Closed testers see this listing when they opt in.
Do this preparation outside Play Console — write descriptions in a doc, export screenshots to a folder — then do one clean pass through the Console. Iterating inside the form is how a 1-hour task becomes an evening.
Step 1: Create the Closed Testing Track
In Play Console, select your app, then go to Release > Testing > Closed testing in the left menu.
(Fair warning: Google reorganizes this menu roughly twice a year. If you don't see it, look under "Release" or use the search bar at the top of Play Console — searching "closed testing" always finds it.)
Play Console gives you a default track called Alpha. Use it — there's no benefit to creating additional closed tracks for the 12-tester requirement. Click Manage track.
Step 2: Upload Your AAB and Create the Release
Inside the track, click Create new release.
- App signing: accept Play App Signing if prompted (you almost certainly want it).
- Upload your AAB. 5-20 minutes depending on size and connection. Since August 31, 2026 the bundle must target API level 36, or Play Console rejects the upload (how to fix the target API error).
- Release name and notes: the notes are shown to testers — one honest sentence ("First closed test build — please open the app daily") outperforms changelog boilerplate.
- Click Next, resolve any errors or warnings, then Save and publish (or send to review, depending on your Console version).
Your release now goes into Google's review queue. For a first release this typically takes a few hours to 2 days. This is the wait most tutorials skip: the opt-in link does nothing useful until this review passes. Share it early and testers hit an error page, conclude your link is broken, and stop trying — you burn your one shot at "hey, can you test my app?" goodwill on a dead link.
Step 3: Choose Countries (The Silent Killer)
Under the track's Countries / regions tab, you must explicitly select where your closed test is available.
This is the single most common silent setup failure I see. The symptom: a tester clicks your opt-in link, taps "Become a tester," opens the Play Store — and sees "This app is not available in your country." No error in your Console. No warning. Your tester count just quietly doesn't move.
Unless you have a specific reason not to, select all countries. Closed testing availability is separate from your future production availability — you're not committing to a global launch, you're just not blocking the tester whose Google account is registered in a country you forgot.
Step 4: Add Your Testers (Email List or Google Group)
Under the track's Testers tab, you have two options:
Option A — Email list. Create a list, name it, paste tester emails (comma-separated). Two rules that cost people days:
- The email must be the one logged into the Play Store on the tester's phone — not their work email, not the address they message you from. Half of all "I opted in but nothing happened" cases are this.
- After adding emails, make sure the list's checkbox is actually ticked on the track. A saved-but-unselected list looks done and does nothing.
Option B — Google Group. Add a group's address instead, and anyone who joins the group becomes eligible. This is what testing services (including onTest) typically use — adding one group address once beats editing an email list every time a tester joins or gets replaced.
For a DIY test with friends: email list. For anything where testers may rotate: Google Group.
Step 5: Copy the Opt-In Link and Share It Properly
On the same Testers tab, copy the "Join on the web" opt-in URL. It looks like:
https://play.google.com/apps/testing/your.package.name
Each tester must, in this order:
- Open the link while signed into the Google account you added
- Tap "Become a tester" — this is the actual opt-in event
- Follow the Play Store link and install the app with that same account
When you share the link, include those three steps in the message. Verbatim. I learned this the hard way with Motion Cues: I sent a bare link to my family group, and got back screenshots of the Play Store home page, an App Store search (my aunt has an iPhone), and one "it says become a tester, do I click it?" Every step you don't spell out becomes a support conversation. Recruiting the testers in the first place is its own topic with seven methods compared here.
Step 6: Verify Opt-Ins and Watch the Clock Start
Back in Play Console, the track shows your opted-in tester count. This number is the only truth. Not WhatsApp replies, not "yeah I installed it" — the Console count.
Two things about the clock, both documented in detail in the 12 testers 14 days requirement explained:
- It starts when the 12th tester opts in (and your release is live on the track). Eleven testers for a week counts for nothing.
- It's the last 14 days, continuously. If the count dips below 12, the window rebuilds.
And one thing about what happens during the window: opt-ins alone aren't the goal. Google evaluates whether your testers actually use the app — opt-in, install, and daily usage are three different levels, and only the third one reliably passes. Plan your tester communication for 14 days of engagement, not one day of clicking links.
The Four Setup Mistakes That Stall Launches Silently
After my own two launches and hundreds of customer tests, these four account for nearly every "setup looked fine but nothing is happening" email I get:
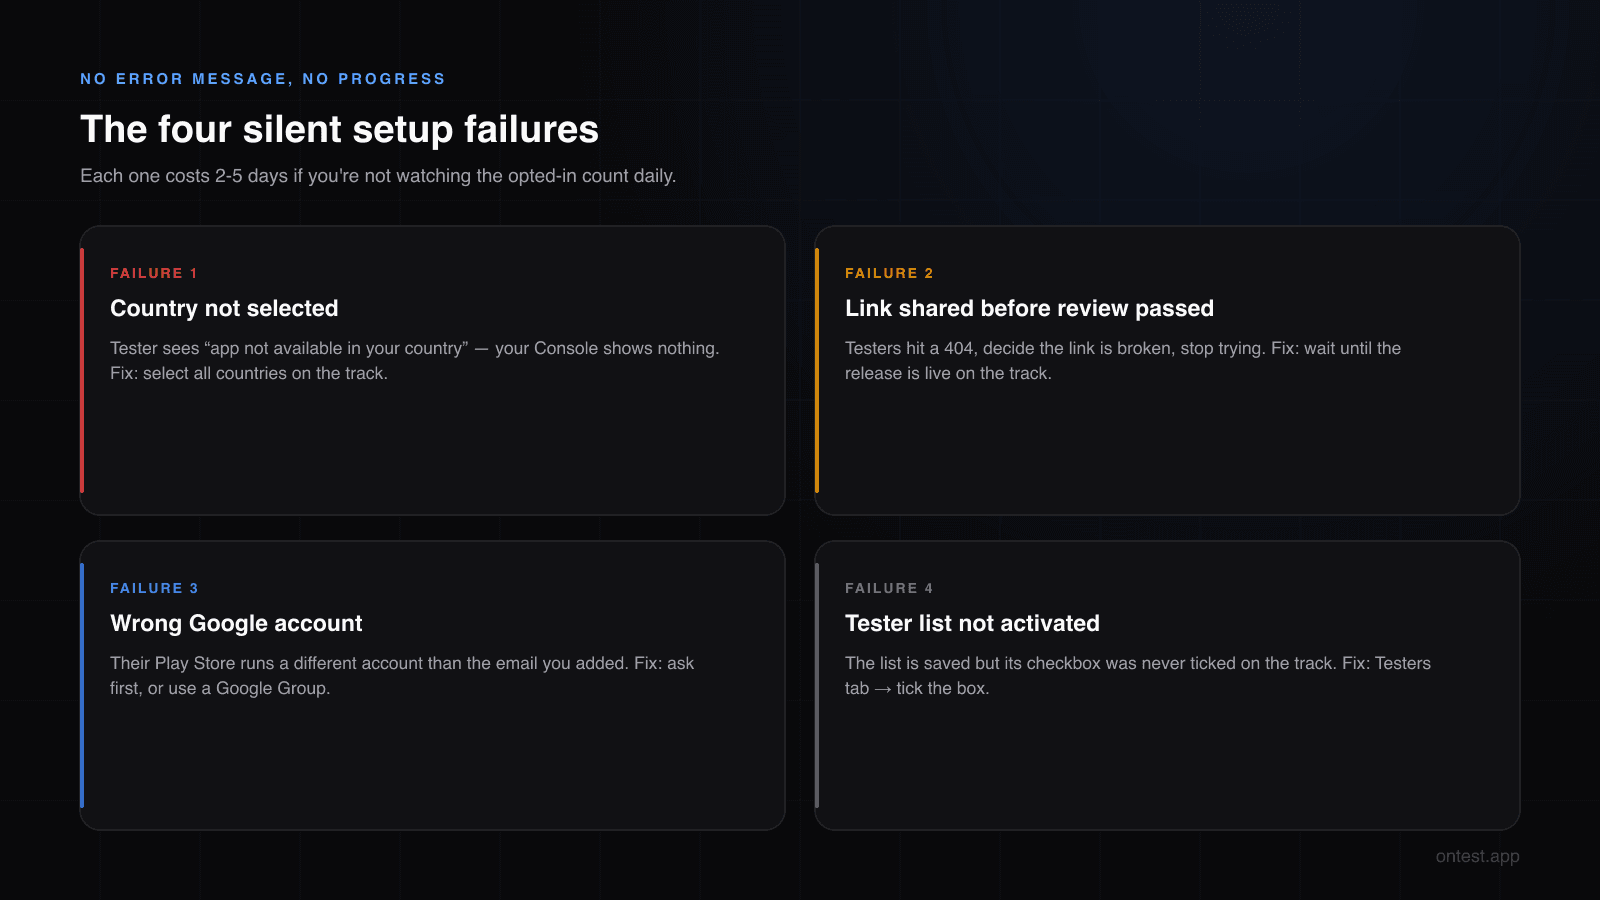
1. Countries not selected. Symptom: "app not available in your country" on the tester's screen, silence in your Console. Fix: select all countries on the track. (Step 3 — it deserves its own repetition.)
2. Opt-in link shared before the release was approved. Symptom: testers see a 404 or "item not found." Fix: wait for the release status to show as live on the track, then share. Check status under the track's Releases tab.
3. Wrong Google account. Symptom: tester swears they opted in; your count doesn't move. Their phone's Play Store runs a different account than the email you added. Fix: ask each tester which account their Play Store uses before adding emails — or use a Google Group so they can join with whichever account is real.
4. Tester list saved but not activated. Symptom: nobody can opt in at all. The list exists in Play Console but its checkbox was never ticked on the track. Fix: Testers tab → confirm the checkbox next to your list.
None of these produce an error on your side. All of them cost 2-5 days if you're not watching the opted-in count daily during week one.
What Comes After Setup
Setup is Phase 1 of six — I mapped the full timeline from setup to production approval here, but the short version:
- Recruiting to 12+ is the phase that decides everything: hours with a service, 2-6 weeks DIY
- The 14-day window runs — keep testers active, push 2-3 minor updates, take notes
- The production access questionnaire follows — all 10 questions with passing templates here
- Google's review takes 3-7 business days — the 2026 review-time breakdown is here
If the setup is done and the wall you're staring at is "now find 12 real people with Android phones" — that's exactly the gap onTest fills: 12 real testers on premium Android 14+ devices opt in within hours of your order, use your app daily for all 14 days, and send daily screenshots as proof. One flat package: 12 testers, 15 days (14 required plus 1 bonus day), $19.99.
Frequently Asked Questions
Where is closed testing in Google Play Console?
Select your app, then Release > Testing > Closed testing in the left menu. Google reorganizes the Console UI periodically — if you can't find it, type "closed testing" into the search bar at the top of Play Console.
How long does Google take to review a closed testing release?
A few hours to 2 days for most first releases. Until this review passes, your opt-in link shows testers an error page — don't share the link before the release is live on the track.
Do internal testing days count toward the 14-day requirement?
No. Only the closed testing track counts toward the 12 testers, 14 days requirement. Internal testing is useful for pre-release smoke tests, but time spent there contributes nothing to production access.
Why does my opt-in link say the app is not available?
Two usual causes: the release hasn't passed Google's review yet, or you haven't selected the tester's country under the track's Countries/regions tab. Select all countries unless you have a specific reason not to — closed testing availability doesn't commit you to a production launch in those countries.
Should I use an email list or a Google Group for testers?
Email list for a fixed set of friends. Google Group when testers may rotate — you add the group address once, and anyone who joins the group can opt in. Testing services typically use groups so replacements don't require Console edits.
When exactly does the 14-day clock start?
When your release is live on the closed track and the 12th tester has opted in. Time with 11 or fewer opted-in testers doesn't count, and the window must be the last 14 days continuously when you apply.
Can I update my app during the closed test?
Yes — and you should. Pushing 2-3 minor updates during the 14 days signals active development, and Google's reviewers treat a zero-update test as evidence that no real testing happened. Just avoid updates in the final 3-4 days: testers must install them, and half will forget, creating an activity gap.
Do my 12 testers need to keep the app installed for all 14 days?
They need to stay opted in, and their engagement is evaluated. An uninstalled or never-opened app produces the flat engagement pattern behind most "more testing required" rejections. What counts as genuinely active is its own breakdown.
Does setting up closed testing cost anything?
The setup itself is free (beyond the one-time $25 developer account fee you've already paid). The real cost is recruiting 12 engaged testers — free channels cost 2-6 weeks of time, paid services cost $15-30.
Related guides
- Target API 36 in Closed Testing: The upload error new apps hit since August 31, 2026, and how to fix it.
- Google Play's 12 Testers 14 Days Requirement Explained — The rule this setup exists to satisfy, clause by clause.
- Personal vs Organization Google Play Account — Check whether the requirement even applies to your account before building the track.
- How to Get 12 Testers: 7 Methods Compared — The step after setup, and the phase that decides your timeline.
- What Counts as an "Active" Tester? — Opt-in vs install vs daily usage, and which one Google actually measures.
- How Long Does Google Play Closed Testing Actually Take? — The full six-phase timeline this setup kicks off.
- Closed Testing Rejected? 5 Reasons Why — The problems that surface after setup, and how to fix them.
- Production Access Questionnaire: 10 Questions Answered — The form waiting at the end of the 14 days.
Stuck on a setup step that isn't behaving like this guide says? Email me a screenshot at hello@ontest.app — Play Console changes constantly and I keep this guide current.
Ready to ship your Android app?
Get 12 real testers for Google Play Closed Testing in 14 days.
Get Started